Drawing Page

Dimensioning and Surface Finish


Dimensioning


Linear Dimensioning


Note: A dimension which is not to scale is shown underlined


Angular Dimensioning


Chain-Parallel dimensioning
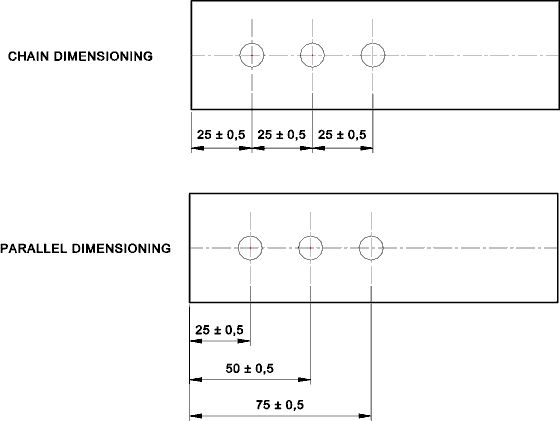
Examples of chain and parallel dimensioning are shwon above.   The advantage of parallel dimensioning is that there is no build-up of tolerances.


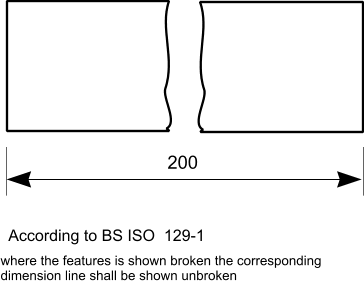
Dimensioning a brokent feature.


Dimensioning Diameters
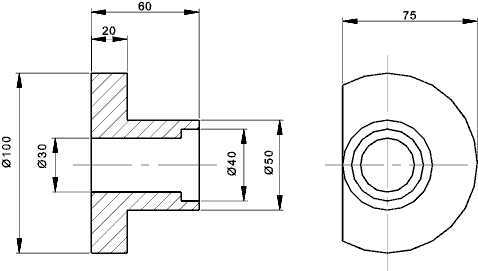
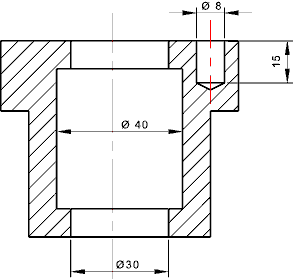
Dimensions of diameters are shown on view providing greatest clarity


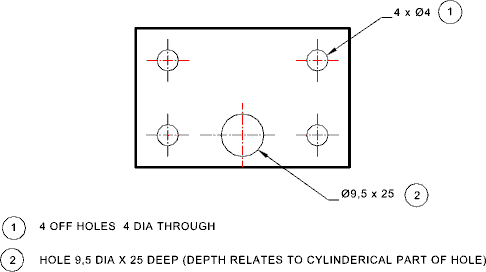
Dimensioning Holes


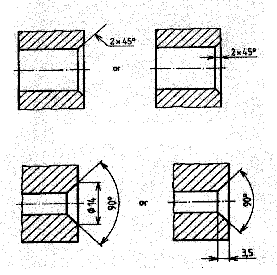
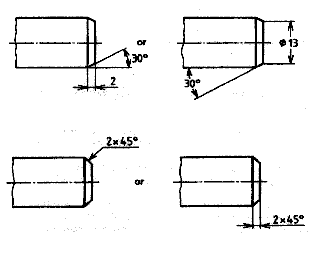
Dimensioning Chamfers/Countersinks


Metric Screw Threads

Thread Designation

  • The complete designation of a screw thread gives

  • the thread symbol e.g. M for Metric
  • the thread size e.g. 6
  • the thread pitch e.g. x 1
  • the tolerance class e.g. 6H(Female) 6g (male)
  • the length of thread if not dimensioned separately eg. x 30 LNG

Notes:
If the thread is standard course then the pitch need not be shown. However it is better that it is always shown
If the tolerance grade for the pitch diameter and the major diameter is the same then only one needs to be shown.
Threads right handed (clockwise turn to screw in) unless a -LH suffix is added to indicate left hand thread.

The Class of Fit is a measure of the degree of fit between mating internal and external threads.  


Classes of Fit

  • Three main Classes of Fit are defined for metric screw threads :

  • FINE: This has a tolerance class of 5H for internal threads and 4h for external threads.
  • MEDIUM: This has a tolerance class of 6H for internal threads and 6g for external threads.
  • COARSE: This has a tolerance class of 7H for internal threads and 8g for external threads.

If one class is shown for a male thread i.e 6g then the tolerance applies to the pitch dia and the major diameter.  A dual tolerance is shown (5h6g) when a different tolerance is applied to the Pitch dia (5h) and the major dia (6h).   The same principle applies to the female thread e.g. a tolerance grade (6H ) applies to both pitch dia and the minor dia.   A tolerance grade (6H7H) refers to 6H for the pitch dia and 7H for the minor dia.

The typical designation for a thread on a drawing is as follows

  • M8 - 6e..This is a M8 course male thread with a 6e external(male) tolerance  (before coating)
  • M8 x 1 - 6e.. This is a M8 course male fine thread with a 6e external(male) tolerance  (before coating)
  • M8 - 6H... This is a M8 course female thread with a 6H internal(female) tolerance  (not coated)
  • M8 - 6H - LH This is a Left hand M8 course female thread with a 6H internal(female) tolerance  (not coated)

Pipe Threads

The typical designation for a Pipe Threads

  • R 1/2    External Taper - Sealing on Thread (BS 21)
  • Rc 1/2   Internal Tape - Sealing on Thread(BS 21)
  • Rp 1/2   Internal Parallel- Sealing on Thread (BS 21)
  • G 1/2 A,B or ext    External Parallel - Not Sealing on Threads -Additional seal required(BS2779)
  • G 1/2(F = full thread)   Internal Parallel Not Sealing on Threads -Additional seal required (BS2779)


Useful Links On Drawing/ Dimensioning
  1. Volvo Drawing Standards......For access to document 101-0005 on European-Standard-based drawing procedures
  2. Metrication- draughting......An extremely useful site - easy to follow
  3. Maryland Metrics..Vast quantity of useful technical information on metric screws/threads in downloadable acrobat pages
  4. Tolerancing screw threads..Very informative page on the Boltscience site

This Page is being developed

Drawing Page

Send Comments to Roy Beardmore