| |
Drawing of Weld Symbols
|
Standards The British Standard for weld symbols is BS EN 22553. When identification of the weld process is required as part of the weld symbol the relevant weld process code is listed in BS EN ISO 4063. Basic Weld Symbol The weld symbol always includes

Note: Weld symbols on the full reference line relates to welds on the near side of the plate being welded. Weld symbols on the dashed line relates to weld on the far side of the plate. If the welds are symmetrical on both sides of the plate the dashed line is omitted. If the dashed line is above the full line then the symbol for the nearside weld is drawn below the reference line and the symbol for the farside weld is above the dashed line. For example see sketch below Supplemetary symbols below. More Detailed Symbolic Representation of Weld 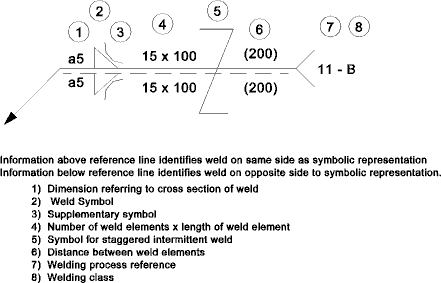
Welding.....Weld process numbers. Table of Weld Symbols 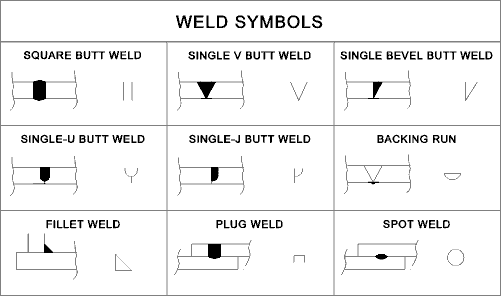
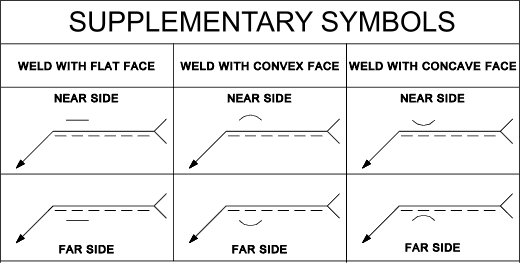
SupplementarySymbols The weld symbols below are used in addition to the primary weld symbols as shown above. They are not used on their own.
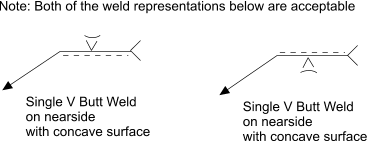
Below is an example of the application of one of these symbol illustrating the identification of the location of the weld relative to the symbol.
Complementary Indication 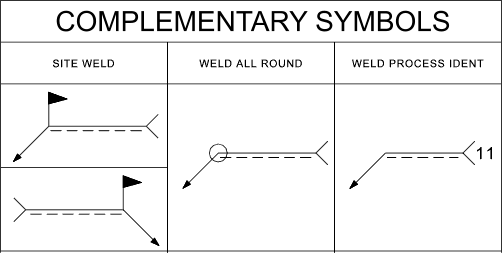
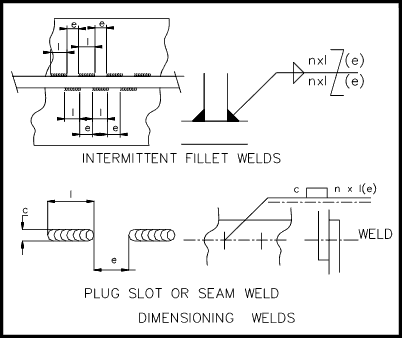
Dimensioning Welds 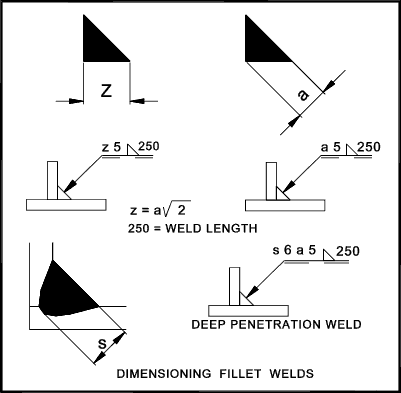
 |
Links Providing information on Welding Symbols on
Drawing
|
|
This Page is being developed
Send Comments to Roy Beardmore
